TRIPLEPOINTS OF INTEREST – WEEK OF APRIL 10

Here’s the scoop in this week’s TPoI: Nintendo soars in the US with Legend of Zelda: Breath of the Wild sales on the Switch, Microsoft introduces a new refund program for Xbox One and PC games, and Germany instructs Twitch streamers and YouTubers to purchase a broadcasting license. With spring in the air, we give you full permission to indulge in chocolate covered sweets!

Nintendo Surpasses Own Record With Switch and Breath of the Wild Sales

New data released by Nintendo and NPD reveals that the Switch is now the fastest-selling console in Nintendo history, with Breath of the Wild attributing to its success. IGN reports that in North America, Nintendo sold 906,000 Switch units while Breath of the Wild sold 925,000 copies. WCCFTech explains that this means the title has an attach rate of 100%, possibly due to consumers unable to obtain a console along with the game. TheVerge adds that Nintendo is working hard to ensure that everyone who hasn’t purchased a Switch will be able to do so in the near future. While the numbers are impressive, Business Insider is curious to see how the upcoming launch of Mario Kart 8 Deluxe and Splatoon 2 will affect Switch sales. CNN believes the Switch needs more data before concluding that it’s a hit. Polygon disclosed that Nintendo will unveil worldwide Switch sales on April 27, so a final verdict won’t be made until then!

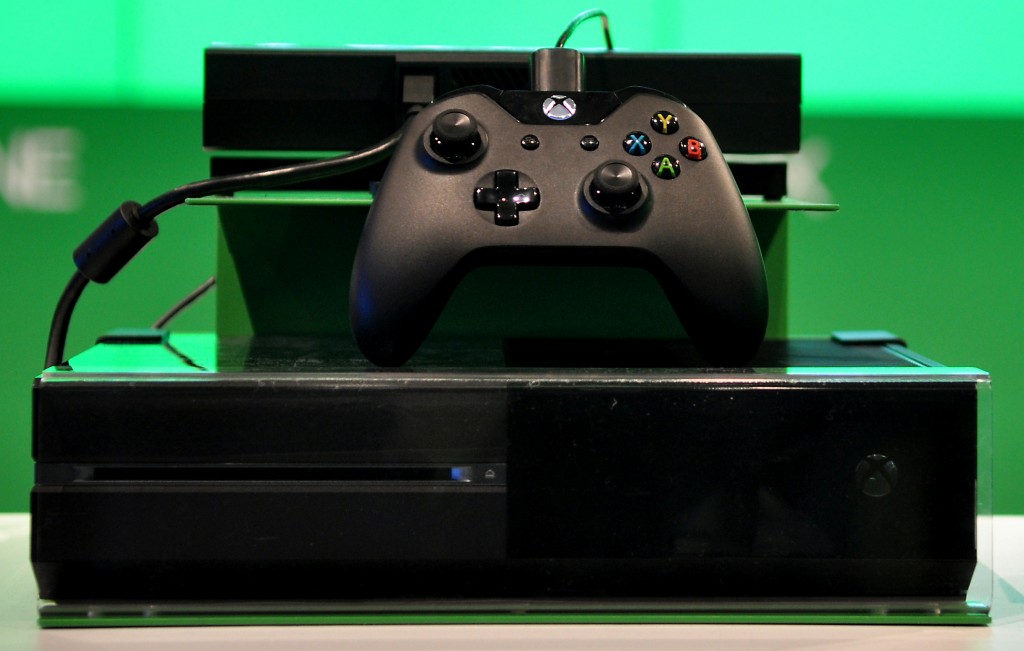
Microsoft Store Revamped in Response to User Feedback

 Nothing’s worse than spending money on an app or game online and not knowing what to do with it once you’re done playing. Due to overwhelming response from gamers, Gamespot revealed that Microsoft sent a message to those enrolled in the Xbox Insider program, stating “In support of offering gamers the freedom of choice, we’re making changes to the Microsoft Store purchase experience by offering customers a simple way to instantly return digital products like games and apps through account.microsoft.com.” According to ArsTechnica, only Alpha members currently have access, but the feature should be available to the public soon. Metro reports that Microsoft will monitor activity and block users that attempt to abuse the program. BGR finds it to be almost identical to Steam’s refund system, but commends Microsoft’s decision and encourages other companies to take the same steps. Waypoint foresees that this may entice users to choose Xbox titles over PlayStation, but expects Sony to release their own refund system to keep up with its competition.

Broadcasting License Required for Twitch Streamers and YouTubers in Germany

German broadcast authority Landesmedienanstalt has deemed live-streaming as “radio broadcast”, enforcing YouTubers and Twitch streamers to provide a broadcasting license from now on. VG24/7 reports that YouTuber PietSmiet was informed he’ll need to apply for a license by April 30 if he were to continue making videos. Depending on the number of viewers, a license may cost between 1,000 to 10,000 euros, and SegmentNext believes streamers may have to turn to alternative websites or launch a Kickstarter to receive donations from fans. PCGamesN warns that those who fail to comply to the ruling will have their channel classified as a pirate station and subject to fines. Thankfully, Gamezone states that Germany is aware that this ruling is outdated and may be overruled in the future, but streamers are not exempt until further notice.

The Rise of Valve – Capitalizing on Digital Distribution Domination

Recently, we had some big news from one of the largest, and well respected, companies in the gaming industry: Valve announced that they were officially entering the console market with “Steam Machines,” gaming consoles that aim to bring the PC gaming experience to the living room. I’m pretty excited to see Valve enter a hardware industry that is currently dominated by only three competitors. They’re bringing a lot of new ideas to the table, such as a haptic-based controller, which may shape the future of the console landscape. Yet, what fascinates me the most is looking back and realizing that Valve has been leaving bread crumb trails all along, even during the inception of Steam.

Steam Client: Digital Domination

When Valve debuted Steam in 2003, it was an absolute pain. The amount of time it took me to patch and boot up Half Life 2 was tedious, and if it weren’t for the fact Valve’s flagship title was absolutely one of the best games of all time, I think it would’ve been dead on arrival. Still, Steam eventually became a pioneer for digital distribution. Many third-party publishers including Eidos, iD Software, Take Two and many others joined in to reap the profit margins from selling their titles online. The acceptance of digital distribution paved the way for consoles to develop a similar model on their platforms; if it wasn’t for Valve playing the role of the innovator in the gaming industry, I doubt the Xbox Marketplace or PlayStation Store would be what they are today.

Digital distribution is the foundation of Valve’s Steam Machines, and without proper dominance on that front, there was no way they could move onto building hardware.

Are You Starting to see the Big Picture?

It was made clear that Valve wanted to move in this direction at Sony’s 2010 E3 Press Conference. Valve’s Co-founder and PC enthusiasts’ most beloved figurehead, Gabe Newell, came onto the stage and stated, “As an industry we’re going through a transition. As an entertainment as a product to an entertainment as a service… it’s about giving gamers a complete connected social experience.”

This foreshadowed Valve’s motives. They wanted to grow their platform into something bigger, encapsulating not only the PC Market, but also console gamers. But the PC developer/distributor needed to create something that would make it easier for console gamers to embrace their platform… and that’s where Big Picture comes in – a new way to experience Steam.

Everything about Big Picture was designed to take advantage of the living room experience and bring console gamers one step closer to the PC world. It was a digital platform with an online user interface any console gamer could jump in and understand. Best of all, with over 2500+ store titles already available at launch, Valve was already one step ahead.

The Final Stretch into New Familiar Territory 

But they faced one final problem — most console gamers couldn’t afford a powerful PC rig to take Valve’s offering.

Valve needed to find a way to bring down the cost, and that’s where Steam Machines make their entrance. With multiple models, Valve’s approach to the Steam Machines hardware allows anyone to pick up a console at their own personal price point. Best of all, it’s customizable, making the idea of owning a Steam Machine much cheaper in the long run since you won’t need to buy a brand new console every year. It’s a win-win situation for Valve, its partners, developers, and gamers everywhere.

What makes it even better is Valve isn’t directly competing with the big three (yet). Their focus has been to dominate the digital distribution space; they already have the upper hand due to how much they’ve invested in the market.

Steam Machines are going to be Big

What we do know is this: Valve’s offering and entrance to the hardware industry is giving momentum to PC gamers and console gamers alike. There is something here for any type of gamer here, and the amount of flexibility will be a key strategy they will capitalize on. We’re one step closer in bridging the gap between both console and PC gamers, and I for one, cannot wait.


Room for Everyone

When the subject of gaming comes up in conversation, it’s not dissimilar from discussing movies, television, or literature. “What are you playing these days?” is the gamers’ equivalent of “Did you catch the last episode of…” or “Did you go see…?” There are several unspoken questions that go with it; our friends are assessing where our interests lie, whether we’re keeping up with a franchise or a genre, which spoilers are safe to discuss, and so forth. Answering the question, though, involves assessing the party asking it, as well. If I’m asked what I played last week, do I open with the one about the bittersweet love story told through atmospheric exploration, or the one about punching the alien in the balls so hard he blew up a gas station? Continue reading Room for Everyone

Goodbye, LucasArts, and Thank You

This is my Corley Motors keychain. Corley Motors is a fictional motorcycle manufacturer that the player, as gang leader Ben, must save from a hostile takeover in the classic LucasArts adventure Full Throttle. 

Together with Grim Fandango and his work on the Monkey Island series and Day of the Tentacle (all also LucasArts games), Full Throttle is one of the original games that established Tim Schafer as the luminary designer he is today. It was a game with a mature story, where “mature” didn’t simply mean “guns and nudity.” It was a game whose cutting-edge CD-ROM media allowed it to have a fantastic soundtrack and amazing voice acting, including an unforgettable performance by Mark Hamill as villain Adrian Ripburger. It had clever puzzles, fantastic writing and dialogue, and an ending that dared to be bittersweet instead of gushingly triumphant. I must have played through it half a dozen times.

The cord on this keychain is frayed, held together by just a few remaining stubborn strands, ravaged by time and constant use. I have had this keychain with me for 18 years.

In 1995, thanks to good fortune and geographical convenience, I got to take a field trip with 12 of my high school friends to LucasArts, then located north of San Rafael across the bay from its current San Francisco offices. I still remember walking in and seeing the massive picture of Full Throttle’s Ben behind the front desk (Full Throttle having been the company’s most recent major release), and gaping in wonder at the broad array of Lucas paraphernalia and gear on display around every corner. On one wall, backdrops and concept art from Sam & Max cartoonist Steve Purcell. In the corner, a full-sized X-wing cockpit set in front of a green-screen, used to film the cutscenes for Rebel Assault II.

I’d been a gamer all my life, but this was my first visit to the inside of a game studio, and I was awestruck. I was too young and unfamiliar with the industry to appreciate who I was meeting and what I was seeing, but I knew the culture there was something I wanted to be a part of. On the way out, each member of the tour was given a Corley Motors keychain as a souvenir. In hindsight, I think I can pinpoint that tour as the day I started giving serious, non-daydreaming thought to working with games, one way or another.

Four months ago, Tim Schafer was the host of Ümloud in San Francisco, where I joined a group on stage to play Rock Band for charity. As the party was winding down, several fans had the chance to share a brief chat with Schafer and have their picture taken with the now-legendary game creator. When my turn came, I produced my tattered keychain, at my side where it’s always been, and briefly thanked him for being an inspiration so long ago. Tim’s eyes lit up in surprise when he saw the trinket. “Where did you get this? They only ever made a handful — even I only got a couple of them.” I explained its origin, and its significance to me — and Tim took my picture with it.

Today, Disney — the new owners of LucasArts after Lucas’ own sale of his properties — announced they were shutting down LucasArts completely. The licenses will still be out there, and there may be new games under the Lucas label, but the studio is gone for good. There will no longer be a place where people come and work on creative new ideas, in a sea of Star Wars art and classic gaming souvenirs and call themselves LucasArts.

I am sure, as is true of the studio’s original stars like Schafer, Gilbert, Grossman, and others, that all of the people losing their jobs today will find new chances to create, and go on to build magnificent things that will stand the test of time. To all of them, though, to anyone who ever worked for LucasArts — thank you, from all of us who ever wished we could do the same. I’ll carry this piece of your legacy in my pocket and in my memory.

Cross-posted to Frisky Mongoose, TriplePoint’s blog on social, local, mobile, and gaming news.

5 Tips for Building your Gaming PC, Continued

Earlier this week, I wrote a blog post that outlined 3 things to consider when looking building your own gaming PC. Part 2 of this article covers the two remaining tips for constructing your PC and getting it up and running.

Part 4: Setup and construction of your PC. You’ve now picked out your parts; you have your core components unboxed and are ready to create the monster that will be your gaming PC. The most important first step that many people skip over is making sure all of their ordered parts work, specifically before you begin to put your parts into your case. It is extremely important to take this first step because it is much easier to test and swap out non-working parts before they are secured into your case.  Important side note: make sure to ground yourself to avoid harming your computer parts with electrostatic discharge. In addition to this, anytime you are connecting or disconnecting parts, unplug your power supply from its electrical source, and ensure that the switch on the back is in the “off” position.

The next step is to connect your core components to your motherboard. This includes your processor, heatsink, video card, RAM, primary hard drive, and power supply. For your processor, make sure you read the instructions and set up your processor in the correct pin slots. Similarly, there are specific slots to put your RAM sticks in. All motherboards are different, so consult your included motherboard booklet to find the correct ones. For your PSU, make sure you run power to the 24-pin connector, and the 8-pin power connector to your mobo, as well as the power connectors on your graphics card.

With everything set up outside of your case, it will look something like what is picture above. In order to make sure your parts work, you will need to close a power circuit on your mother board. You can use the end of a screwdriver to do this, closing the circuit and connecting the two points on your motherboard panel titled “power switch.” I have included a picture here to show you what the two power pins look like in the mobo booklet as well as on the mobo itself, which are highlighted in red.

Note that there are only two pins you should be connecting, and the panel is located on the lower right corner of your motherboard. After you touch the metal end of a screwdriver to these two points, your computer should start up. You’ll notice the heatsink fan, PSU fan, and GPU fan all begin to spin, as well as various lights on your motherboard coming alive. If any of the fans are not spinning, turn everything off by flipping the switch on the back of your PSU and recheck the connection of your cables and parts.

Once you ensure that all of your parts are working, you should disconnect your entire out-of-case setup, except for the processor/heatsink, and begin to put your parts into your case, starting with the motherboard. Once the motherboard is in and secure, you can connect your PSU, GPU, RAM, hard drives, DVD drive, case fans, and case buttons to your motherboard. All motherboards differ from one another, so if you are unsure of where or how to connect a certain part, consult your motherboard user manual. Additionally, you can leave a comment on this article and I will do my best to address your concerns myself.

You’ll want to take your time in hooking everything up to ensure proper cable management. This will help prevent your parts from heating up and improve your case airflow. As often as you can, run your cables through the back panel of your case to reduce clutter around your core components. Once you have all of your parts in, put those case panels back on and hook up your mouse, keyboard, and monitor(s). Before you’re ready to game, there is one last step you need to take.

Part 5: Get your machine running. Once your computer is up and running, you’ll need to get all of your vital programs installed and running. For newer machines, you’ll want to install a 64-bit version of Windows. If you opted to get an SSD, make sure that you select to install the Windows OS on your SSD and not your internal hard drive. Once Windows is installed, you will be to install important drivers and BIOS. Your motherboard should come with a CD that has all of the software you need. Be wary of installing all of the software that is included on your disc, as some of the programs aren’t needed. All motherboard drivers differ, so if you’re unsure of what a specific driver does, Google your motherboard manufacturer with the driver name to find out more information. On top of your motherboard drivers, make sure to install the latest graphics drivers for whatever GPU you use. While your GPU may come with an installation disc, the driver in there will likely already be outdated. It’s also important to mention that if you are installer a newer graphics driver, you should completely remove the previous driver before installing the new one.

Once you have your important drivers installed, you can begin to put on software that will enhance your machine. For Antivirus software, I like to use Microsoft Security Essentials, as it is a low memory anti-virus that is free for Windows users and performs phenomenally. Additionally, you’ll want to install Malwareytes and Spybot: Search and Destroy. Both are great programs that should be run every two to four weeks to ensure that your computer stays spybot and malware free.

The other software you should put on your computer depend on your personal computing habits. When you are looking to install all of your software, unfortunately, it can be difficult finding all of the correct installers from each respective website. A great tool to use in order to easily install numerous software programs is Ninite. In a nutshell, Ninite is an installer aggregator: you select which programs you would like to install and Ninite then makes one simple installer, which will include everything you’ve chosen. Note that in order for your Ninite installer to work, you will need an internet connection.

Once your software is set up, it’s time to game! If you have any experience with gaming at all, you’re likely familiar with Valve and their gaming portal, Steam. If you aren’t, Steam is a one-stop-shop where you can buy, download, and play almost any PC game available. What’s great about Steam is that you can take your account with you anywhere, enabling you to log-in to your Steam account on any computer and download/play your games.

You are now a PC gamer; congratulations! Take solace in the fact that you can play almost anything, and at any point can upgrade your system to enable a better gaming experience. If you have any questions about setting up your PC or would like recommendations on parts to get, let me know in the comments.

Happy Gaming!

5 Tips for Building your Gaming PC

What Not to Do...

Launched by Pong 40 years ago, home gaming has become a staple in millions of households worldwide. Whether you’re a mobile, console, or PC gamer, the evolution of technology will continue to make all forms of gaming available to the masses.  Newer, better technology will also become cheaper, which will enable a wider audience of gamers to really immerse themselves in their hobby of choice.

While the points can be argued until the end of time, I believe best way to really experience and immerse oneself into a game experience is through a PC. Contrary to popular belief, PC gaming is not dying, and PC gaming provides a more customizable experience in terms of settings, and ease of use. In addition to this, the graphical capabilities of PCs far outweigh those available on current (and most likely future) generation consoles.

Building a gaming PC is tough, with many different parts that are combined to breathe life into a gaming monster.  Along with providing a sense of do-it-yourself satisfaction, building your own gaming PC is one of the most rewarding experiences for any hardcore gamer or technology enthusiast. Since there are many intricacies involved in creating that perfect gaming PC, I’ve created a list of 5 tips to help everyone, from budget buyers to PC aficionados, in making their perfect PC.

Step 1: Know your budget. There are a million different parts you can buy for your PC gaming machine, which makes for millions of different combinations. The great thing here is that building a machine on a budget is totally possible. I recently helped a friend build a mid-tier gaming machine for around $700, while on the flip side I built a top-of-the-line machine with literally the best parts I could buy via newegg.com just for fun. The cost? A cool $7,299.91. I did this just to prove how vast a difference there is with what you can build.

Another important thing to consider for your budget is whether or not you already have a mouse, keyboard, and monitor. A good gaming mouse and keyboard combo can cost around $120, and a single 23” LCD monitor will run you around $160, but these are one-time purchases that will last around 3-5 years or longer if cared for properly. When you are next upgrading your PC, you will likely continue to use the same mouse, keyboard, and display.

Step 2: Pick your pony (company). There are two companies that manufacture central processing units (CPUs): Intel (Integrated Electronics Corporation) and AMD (Advanced Micro Devices). Techradar has a great interview article that very thoroughly looks at the Intel vs. AMD debate.  Personally, I have always gone with Intel processors, which are more expensive but are better for overclocking. AMD CPUs are great processors at a cheaper price than most comparable Intel CPUs. In the end, it usually comes down to personal preference and who has come out with the latest CPU. No matter which one you pick, make sure you pick the corresponding motherboard (mobo).

Just like CPUs, there are also two companies to choose from when looking at graphics processing units (GPUs a.k.a. video cards): NVIDIA and AMD. NVIDIA cards focus on providing a 3D gaming experience to gamers via additional hardware. While 3D can seem like a gimmick to some, I was extremely impressed by Batman: Arkham Asylum at this year’s GDC using NVIDIA 3D. NVIDIA also just released their Kepler series video cards, which currently beat out AMD’s 7990 series as the fastest video cards in the world and for the first time allow 3 independent displays to be run from one NVIDIA card. AMD cards, on the other hand, offer something called Eyefinity through their software, which allows gamers to plug 3 monitors into one card and get a 180-degree view of whatever game they choose to play. While setting up Eyefinity can be difficult, it provides a one-of-a-kind gaming experience that really immerses you into whatever you are playing. Flying a jet in Battlefield 3 and seeing an enemy flank me through the periphery of a side monitor was a jaw-dropping experience.

In the end, it comes down to personal preference and budget. Certain NVIDIA cards are cheaper than their AMD counterparts, and vice-versa. Remember, too, that if you want to fully utilize your video card, you will need 3 displays for your AMD card to run Eyefinity, and a 3D compatible 120Hz monitor for your NVIDIA card to run 3D. 

Part 3: Pick your other parts. Since we have already covered CPUs and GPUs, we want to also look at other core components that make up computers. The most important part of a computer after the CPU and GPU is the Motherboard. As mentioned before, you’ll want to get a mobo that corresponds with your chosen CPU, be it Intel or AMD. Another thing to check is that your chosen mobo has the same socket number as your processor. For example, Intel has LGA 1155, 1156, and 1366 sockets, among others. If your CPU is an LGA 1155 socket, then you want to be sure your mobo supports an LGA 1155 socket. Other than that, ook at the SATA (Serial ATA) speed of your mobo. Most new boards will be SATA 3.0/SATA 6Gb/s. In very simple terms, the SATA number is the speed at which your hard drives will communicate with your motherboard and thus the rest of your computer. The higher the SATA Gb/s number, the faster things will run. Additionally, if you plan on using more than 1 GPU, make sure your mobo has enough PCI-e slots to run your GPUs. Asus and Gigabyte both make quality mother boards that are a great value.

Talking about SATA types brings us to the next vital part of your gaming PC: the hard drive. There are current two main types of hard drives, Internal Hard Drives and Solid State Drives (SSDs). Internal hard drives have moving parts, which can cause a lag when your computer performs certain operations. Internal drives are also relatively inexpensive, and are standard in most pre-built desktop computers and laptops. Solid State Drives have no moving parts, and thus much faster than internal hard drives. Most new ultrabooks (laptops that are extremely thin and fast, like the MacBook Air) come stock with SSD drives. Going from using an internal hard drive to an SSD is like night and day in terms of how much faster your computer speed and response rate will be.

My tip for building the best gaming PC is to buy a 60-120GB SSD to run your operating system (OS). This makes it so that all of the main tasks completed by your computer will be done much more quickly. Since you will be limited on space, you can then buy an internal hard drive to store your music, movies, and other large files. Make sure to get an SSD3 drive as they are the newest and fastest SSDs available.

When building your gaming PC, a big decision to make is what size case you want to have. The main difference between case sizes is not only size, but cable management and air flow. While significantly larger, full tower cases provide better airflow for your parts that are likely to become very hot, like your CPU and GPU. If you’ve got the space and extra funds, I always recommend getting a full tower case.

For power supplies (Power Supply Unit, PSU), there are a few things to consider. A regular PSU comes with all of the connection cables already attached, whereas a modular PSU comes with fewer cables attached, but enables the users to attach additional, included cables, should they need to. Newegg has a very handy Power Supply Calculator which you can use to figure out just how much power you need for your new system. There are a lot of cheaper PSUs that look nice but don’t perform well, so stick with brands like Cooler Master, NZXT , Thermaltake, and XFX to ensure you are getting a quality PSU.  If you’re going to be running more than one video card or any additional cooling, it’s better to have a higher wattage for your power supply.

The last parts you need to complete your gaming PC are Random Access Memory (RAM) and a CD/DVD Drive. RAM is additional memory your computer uses to perform intensive tasks. If you plan on doing any heavy photo or video editing with your machine, I would recommend grabbing 12GB or 16GB of RAM to ensure a smooth experience. For gaming, 8GB of Corsair Dominator or Corsair Vengeance will do the trick. Make sure your RAM frequency is compatible with your chosen mother board to avoid an unnecessary headache. Additionally, if you ever opt to upgrade from 8GB to 16GB, make sure the second 8GB you buy is the same make and type of the first 8GB you bought.

While they are becoming more obsolete, for desktop PCs I think it’s still important to grab a CD/DVD reader/burner for when you do get the occasional physical copy of a game to install. In addition, it’s important to get an aftermarket CPU Fan (heatsink) or liquid cooling for your CPU if you plan on overclocking your PC. A heatsink is like a radiator for your CPU, and while all CPUs come with a stock heatsink, these cannot handle the massive heat generated from an overlocked PC. If you try to overclock your CPU without a heatsink or liquid cooling, you could damage and possibly ruin your CPU.

That’s it for steps 1 to 3. Check out the follow-up article with steps 4 and 5: how to assemble your PC and how to get yourself up and gaming.


GameSpot Debuts East India Company Video Developer Diary

east_india_company_logo_lowresThe first video developer diary for the upcoming PC title East India Company debuted on GameSpot today. The ongoing series be released bi-weekly on GameSpot leading up to the game’s launch. Lead designer Kim Soares of Nitro Games will give viewers a glimpse of East India Company‘s extensive features and share insights from the development process.

Check out the first video developer diary for East India Company on GameSpot at:
http://www.gamespot.com/pc/action/eastindiacompany/video/6209550/

Kim Soares of Nitro Games introduces East India Company

East India Company is a naval war strategy game based on the 18th century East India Companies. East India Company is scheduled for release in Q3 2009 and will be published worldwide by Paradox Interactive.